Windows Server Active Directory VM Setup with VirtualBox and Linux
Published: 2023-11-08

A “white pages” telephone directory © 2010 by Tomasz Sienicki [user: tsca, mail: tomasz.sienicki at gmail.com] - Photograph by Tomasz Sienicki (Own work) Image intentionally scaled down. a phone / telephone book / directory
Active Directory VM Setup with VirtualBox
First thing is download a version of Windows Server…
https://www.microsoft.com/en-us/evalcenter/download-windows-server-2022
You should also have VirtualBox installed…
https://www.virtualbox.org/
Spin up the VM and install Windows Server…
For this guide we’re using Windows Server 2022 Standard Evaluation (Desktop Experience) x64
Custom Install - Utilizing entire disk space
Do you want to allow your PC to be discoverable by other PCs and devices on this network? - No
Decent idea to install VirtualBox Guest Additions
Take a VM Snapshot of the machine before first login with built-in Administrator account
Power down the Virtual Machine using PowerShell. Power on the VM once VirtualBox Network Settings are made
shutdown /s /t 0VirtualBox Network Setup
File > Tools > Network Manager
Create a host-only network
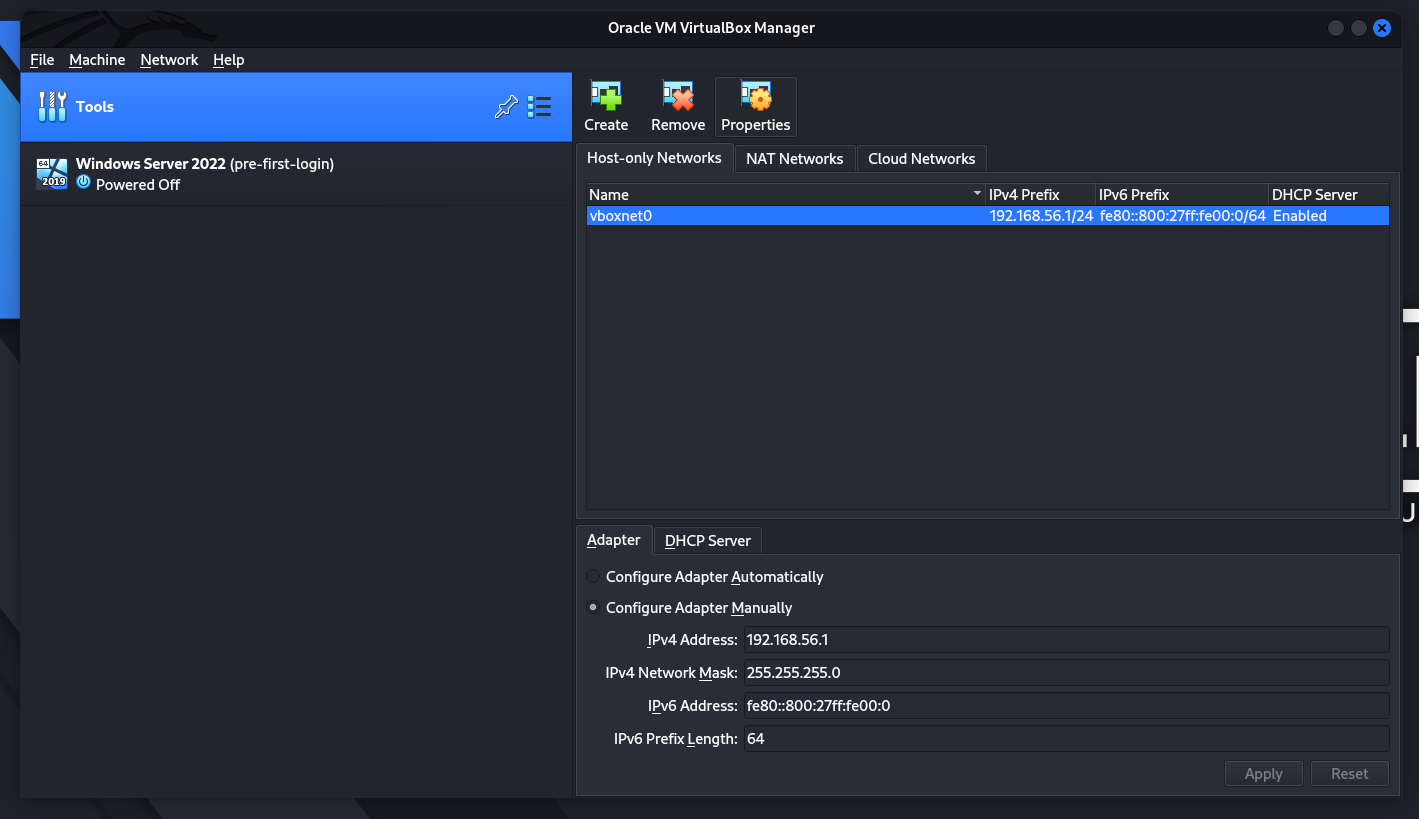
Pick a network or use 192.168.56.1 which is default VirtualBox network address.
Setup a Host-Only network
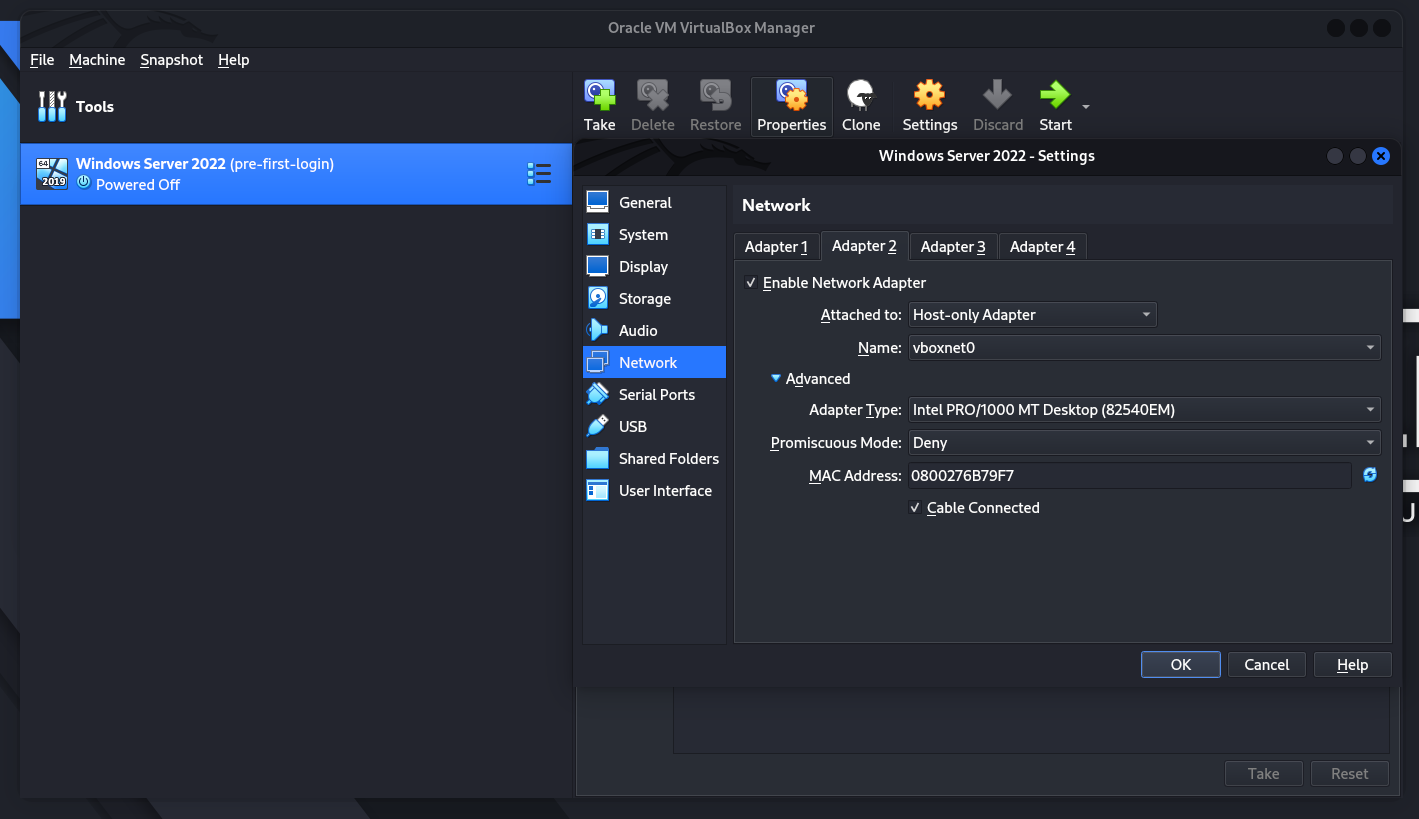
Select the machine and then Settings
Choose the Adapter 2 tab, check the box Enable Network Adapter
Select the dropdown Attached to:, select Host-only-Adapter
Adapter 1 should be NAT in order to let the Windows Server communicate to the outside world using the Host OS (real life) adapter. If you’re running in a sandbox, disable Adapter 1.
Windows Networking Setup
Fire up the VM…
PowerShell…
ncpa.cpl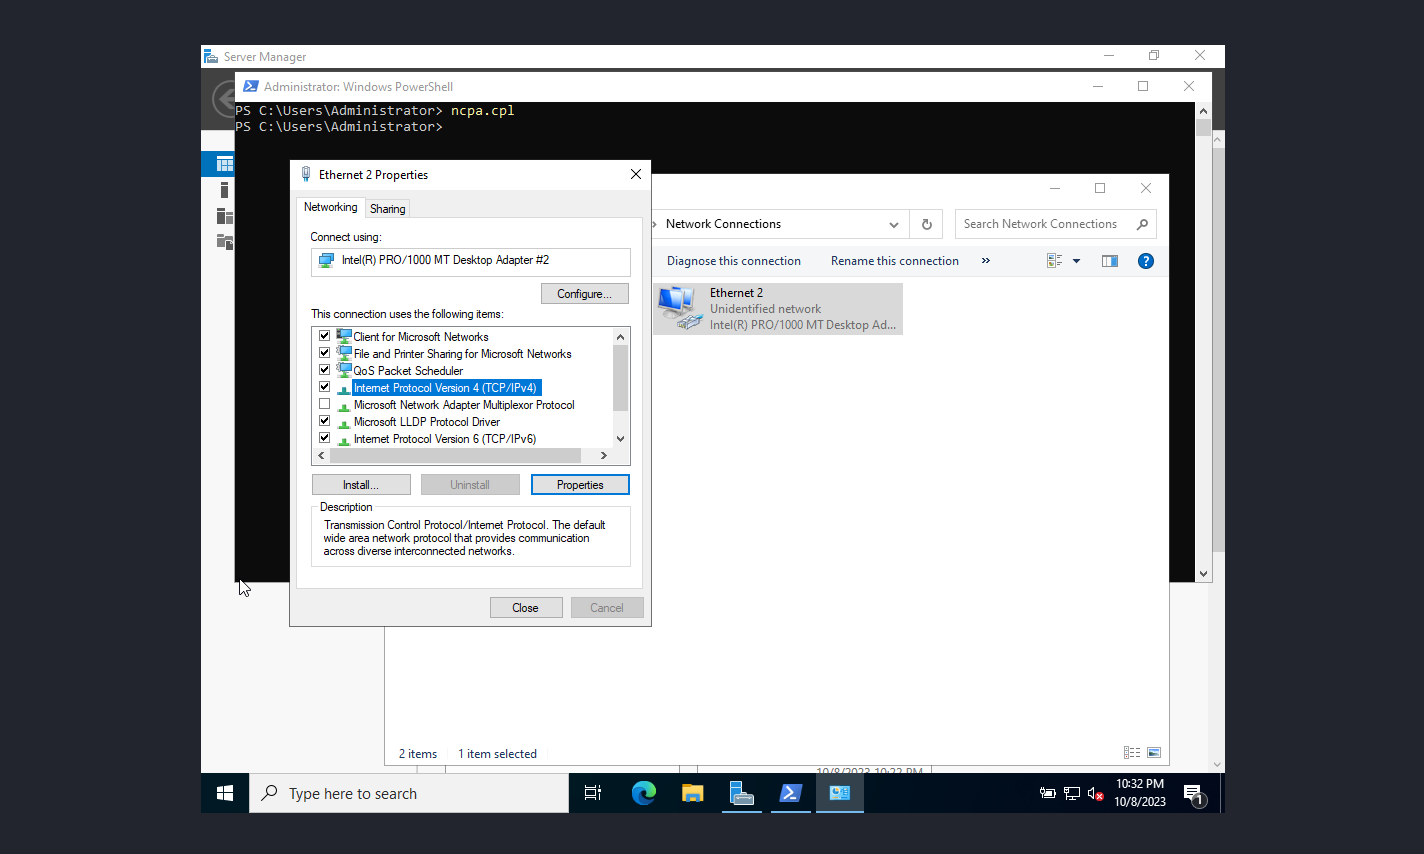
Edit the IPv4 Network Settings
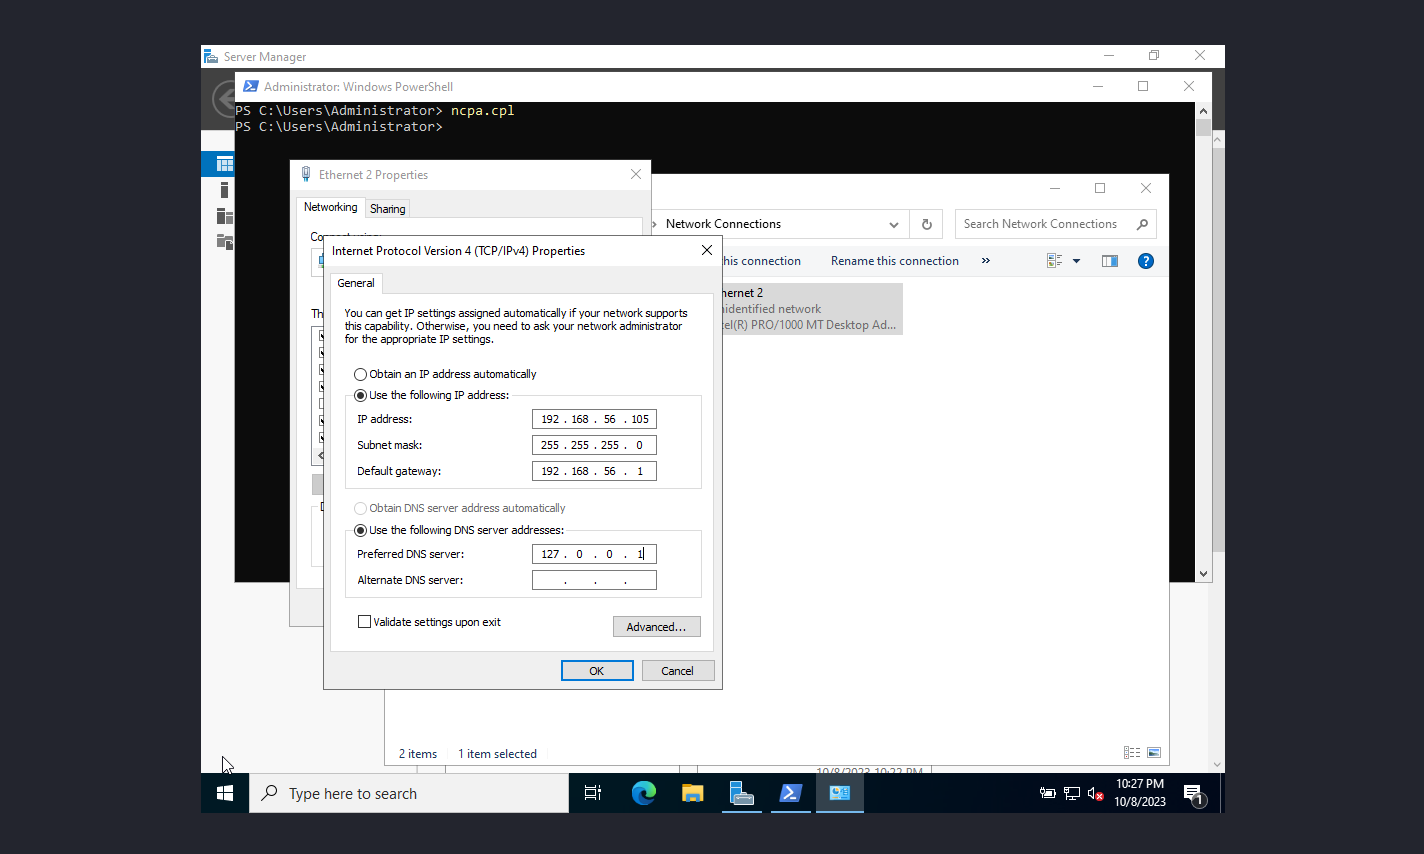
Toggle the Use the following IP address: radio button
Settings breakdown
Ip address: Sets the IP address of our server. I’m using the 192.168.56 subnet from our VirtualBox netw0rk and assigning the server to the 105 slot.
Subnet mask: 255.255.255.0, another way of saying CIDR /24.
Default gateway: 192.168.56.1 is the default gateway for the 192.168.56.1 network.
Preferred DNS server: 127.0.0.1, we set this so the server (localhost) acts as its own Domain Name Server, we’ll setup DNS in a bit…
Try pinging the Windows guest at 192.168.56.105 from the host OS. It should fail, we need to poke holes in the firewall…
Windows Firewall Settings
P0werShell…
wf.msc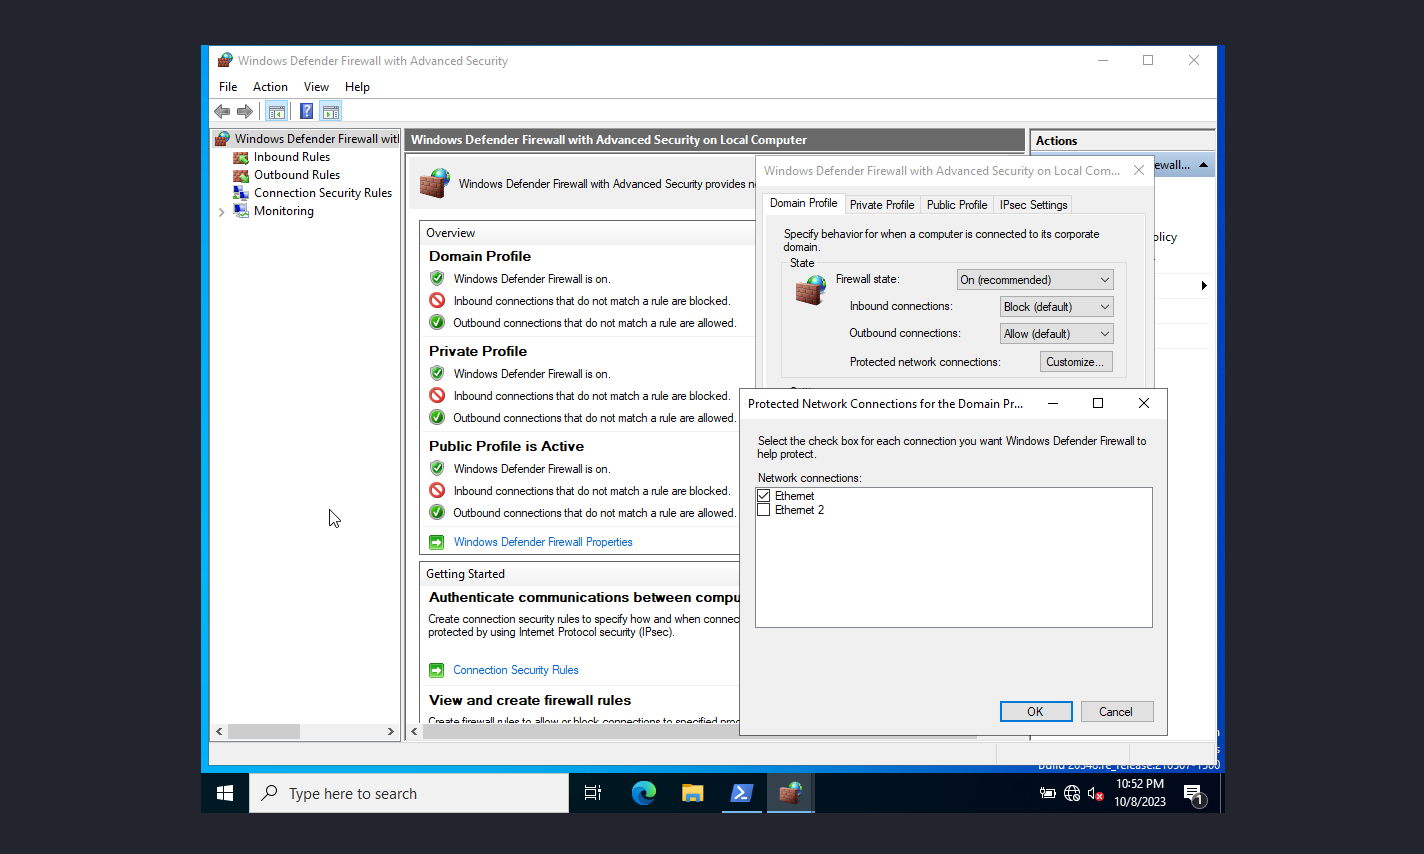
Find and click the Windows Defender Firewall Properties link
Click the Customize… button next to Protected network connections: in the dialog
Uncheck Ethernet 2, this allows Network Traffic to and from the host running VirtualBox. These Ethernet and Ethernet 2 adapters are a referene to the VirtualBox N3twork Adapters we created earlier. Ethernet is our NAT adapter, Ethernet 2 is our Host-only Adapter
Repeat this process for the remaining Private Profile and Public Profile tabs
Try pinging the Windows Server VM (192.168.56.105) from the host OS now…
Install Active Directory
Powershell - If Server Manager isn’t already running…
servermanagerAdd a Server Role
Select Manage > Add Roles and Features
Select Role-based or feature-based installation
Select the Windows Host as the Server (same as Windows hostname)
Check the Active Directory Domain Services check box
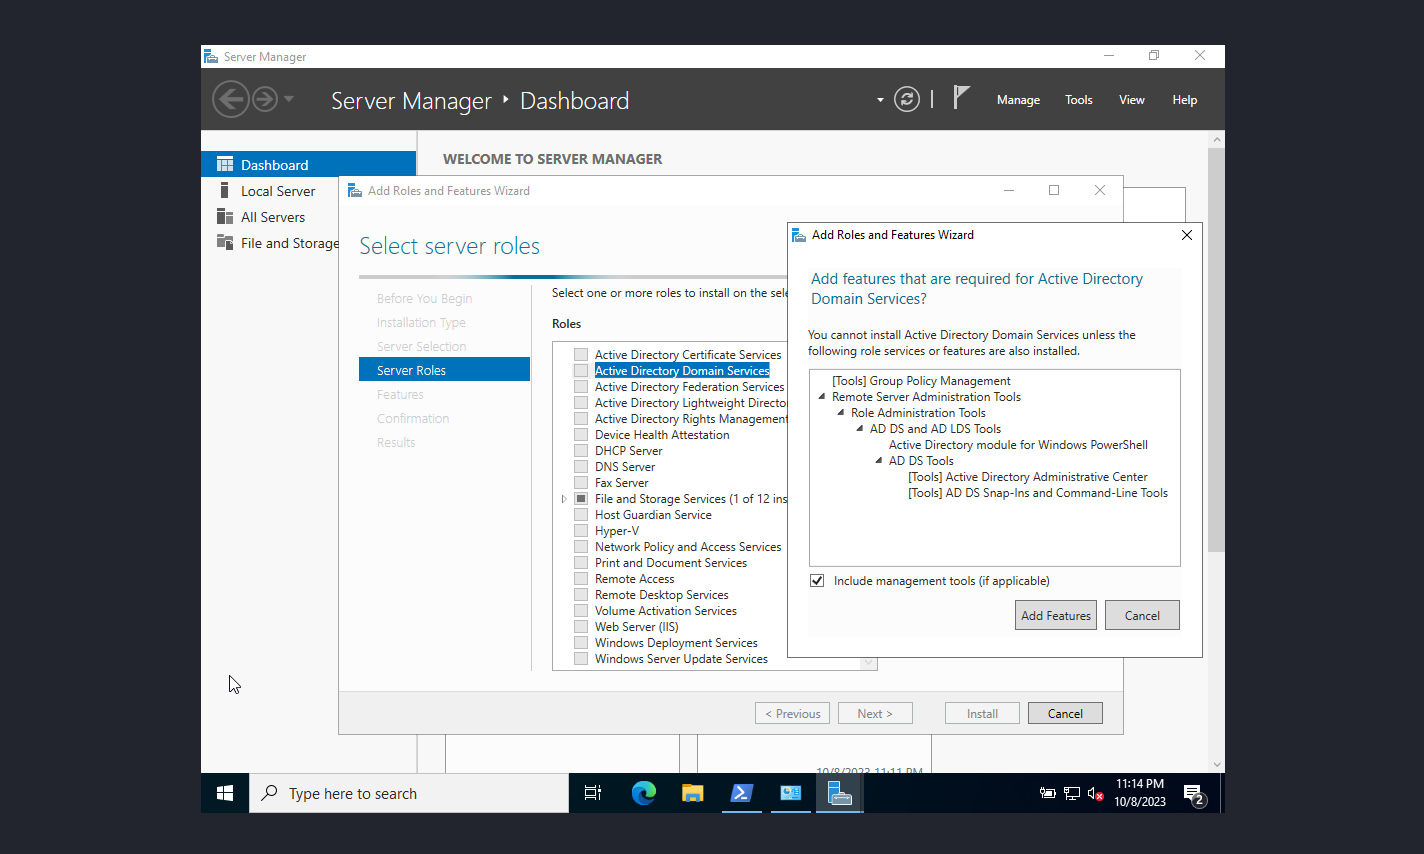 Click Add Features button
Once Role is installed, promote the Server to a Domain Controller
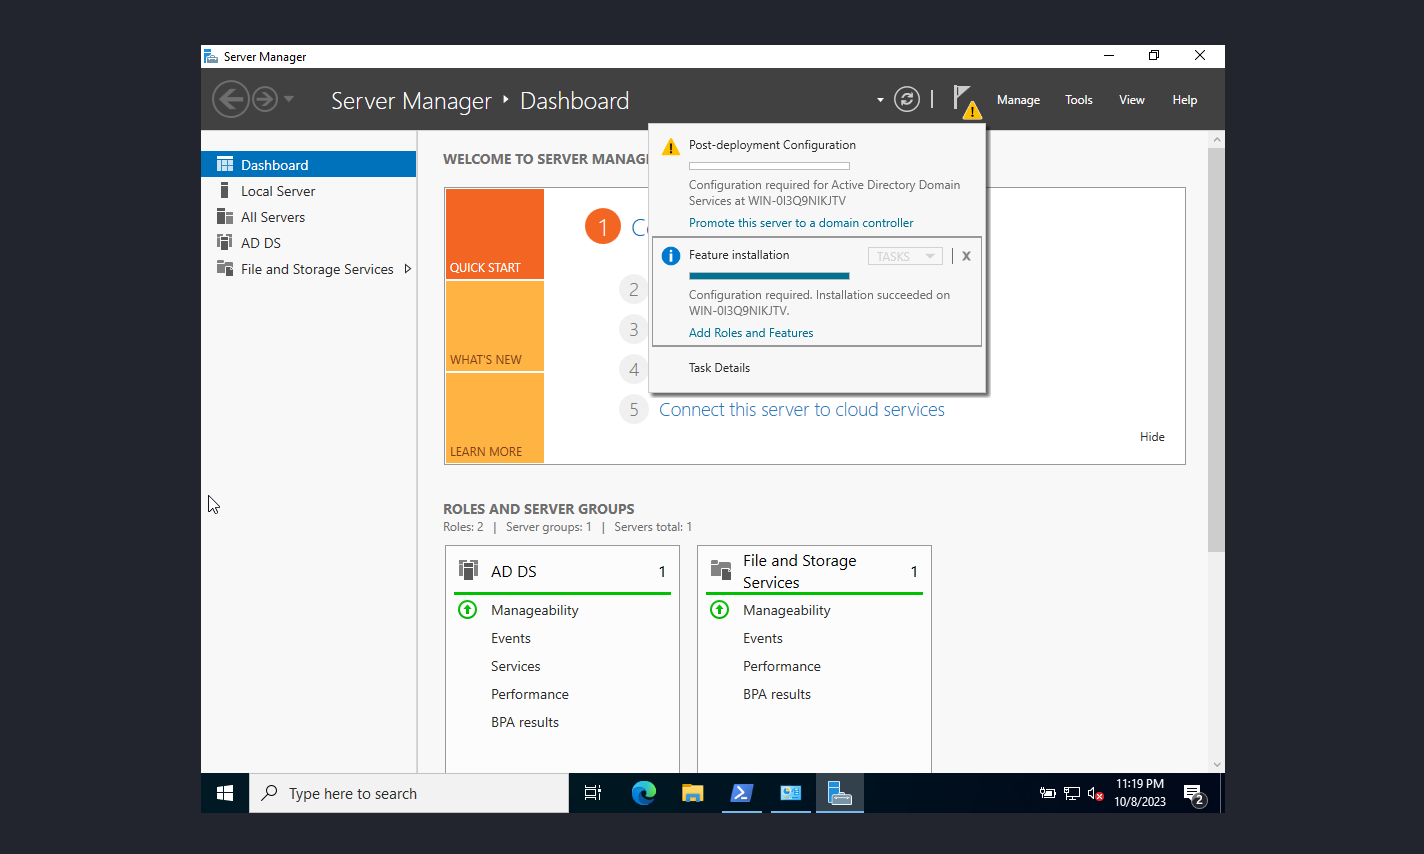
Toggle the Add a new forest radio button
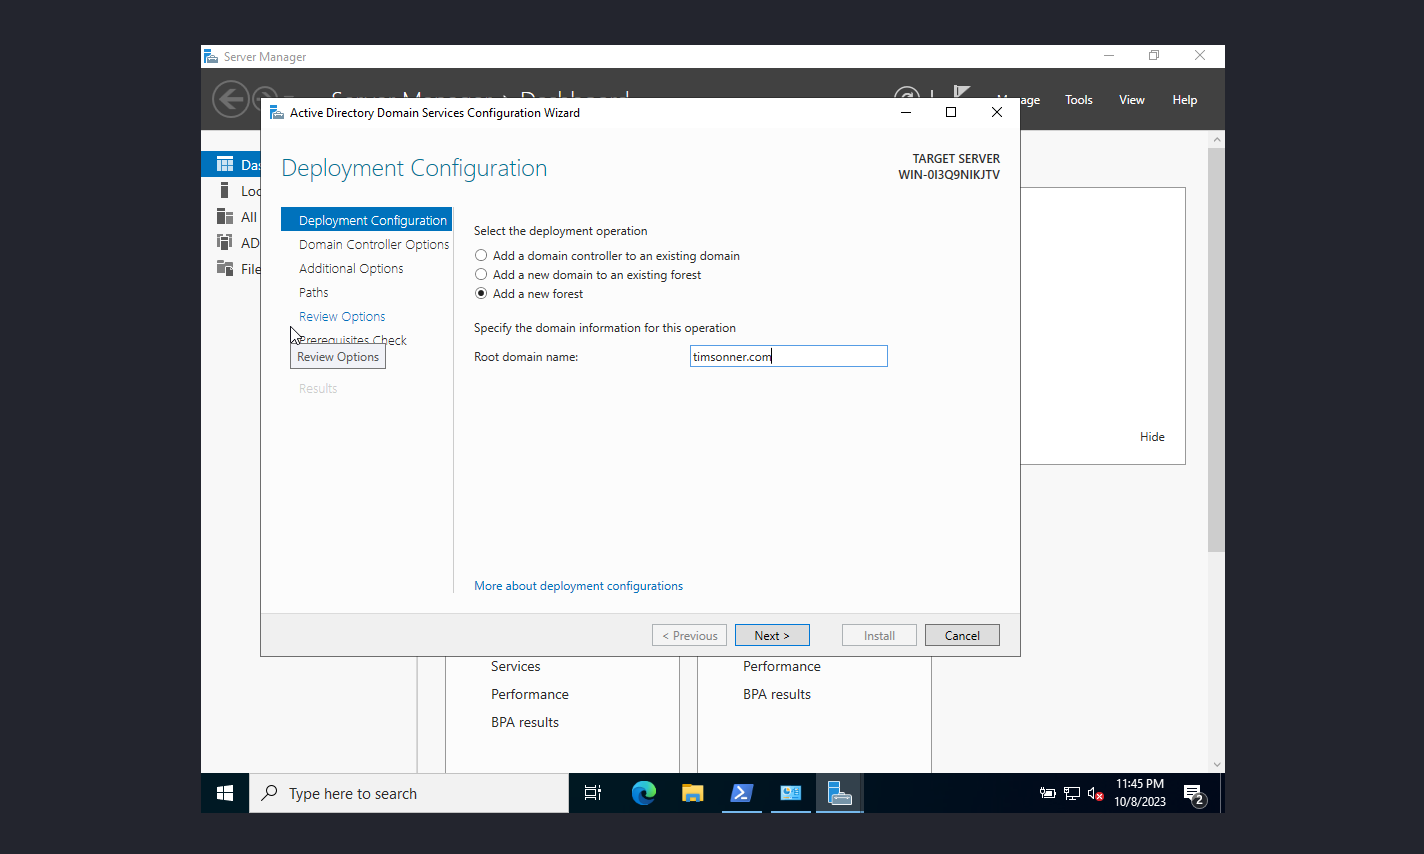
Ignore the warning about DNS delegation
Use default paths
Machine will reboot and apply settings…
The machine is now part of the domain…
Finish setting up DNS
In Server Manager, navigate to Tools > DNS
Expand the Server tree and Select Reverse Lookup Zones
Right click on Reverse Lookup Zones and select New Zone
Zone Type: Default Setting (Primary zone)
Store the zone in Active Directory: True
If you’ve installed DNS before Active Directory Services, the Store the zone in Active Directory checkbox is how you fix your Reverse DNS lookups… Happened to me, idk…
Replication Scope: All DNS servers running on domain controllers in this domain: timsonner.com
Reverse Lookup Zone Name - Network ID: 192.168.56
Create a new Reverse DNS Pointer
In DNS Manager, right click the new Reverse Lookup Zone 56.168.192.in-addr.arpa, select New Pointer (PTR)…
Fill in the hostname with that of the Windows Server
Powershell
hostname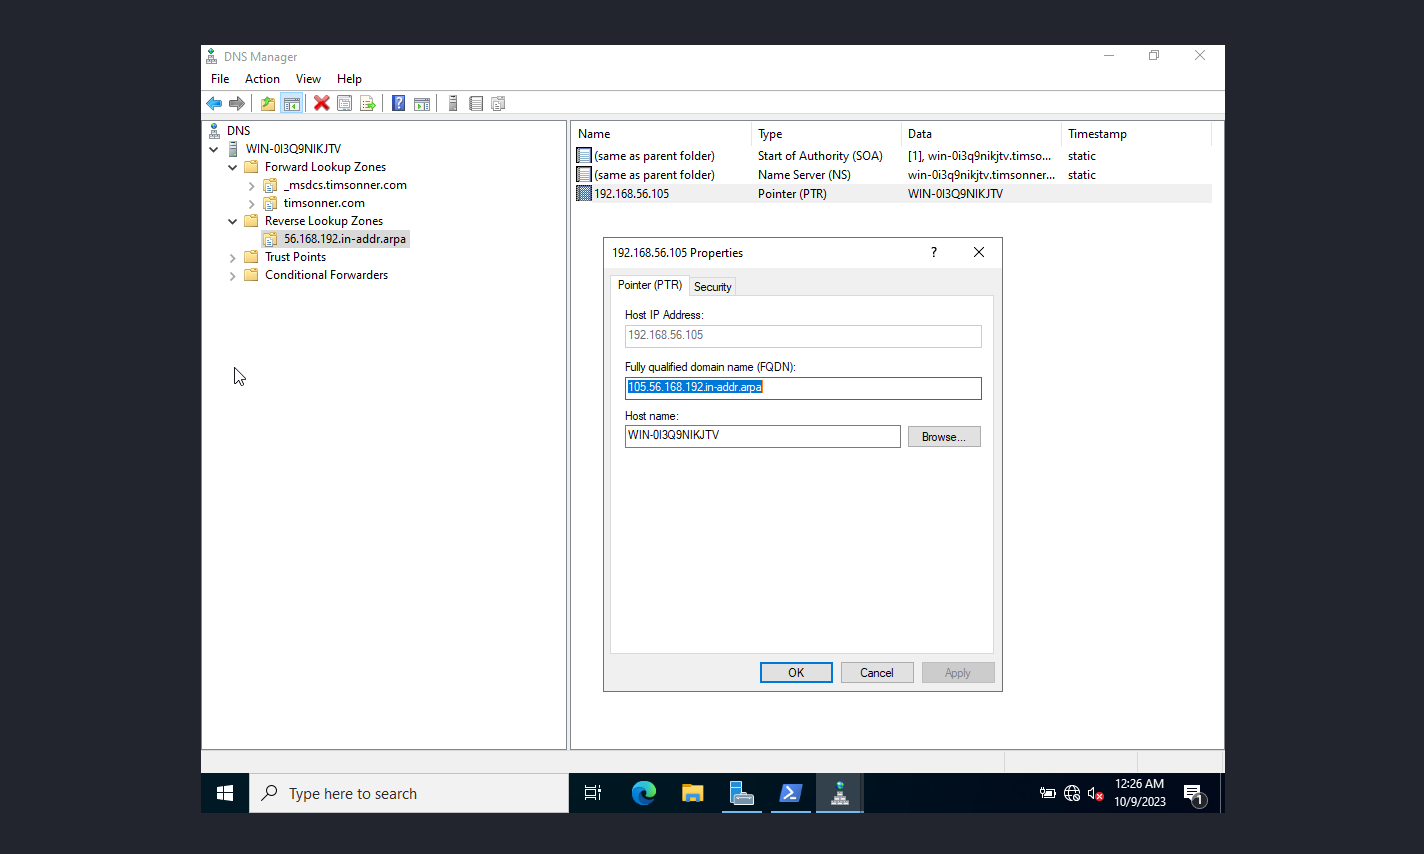
Test out the DNS settings…
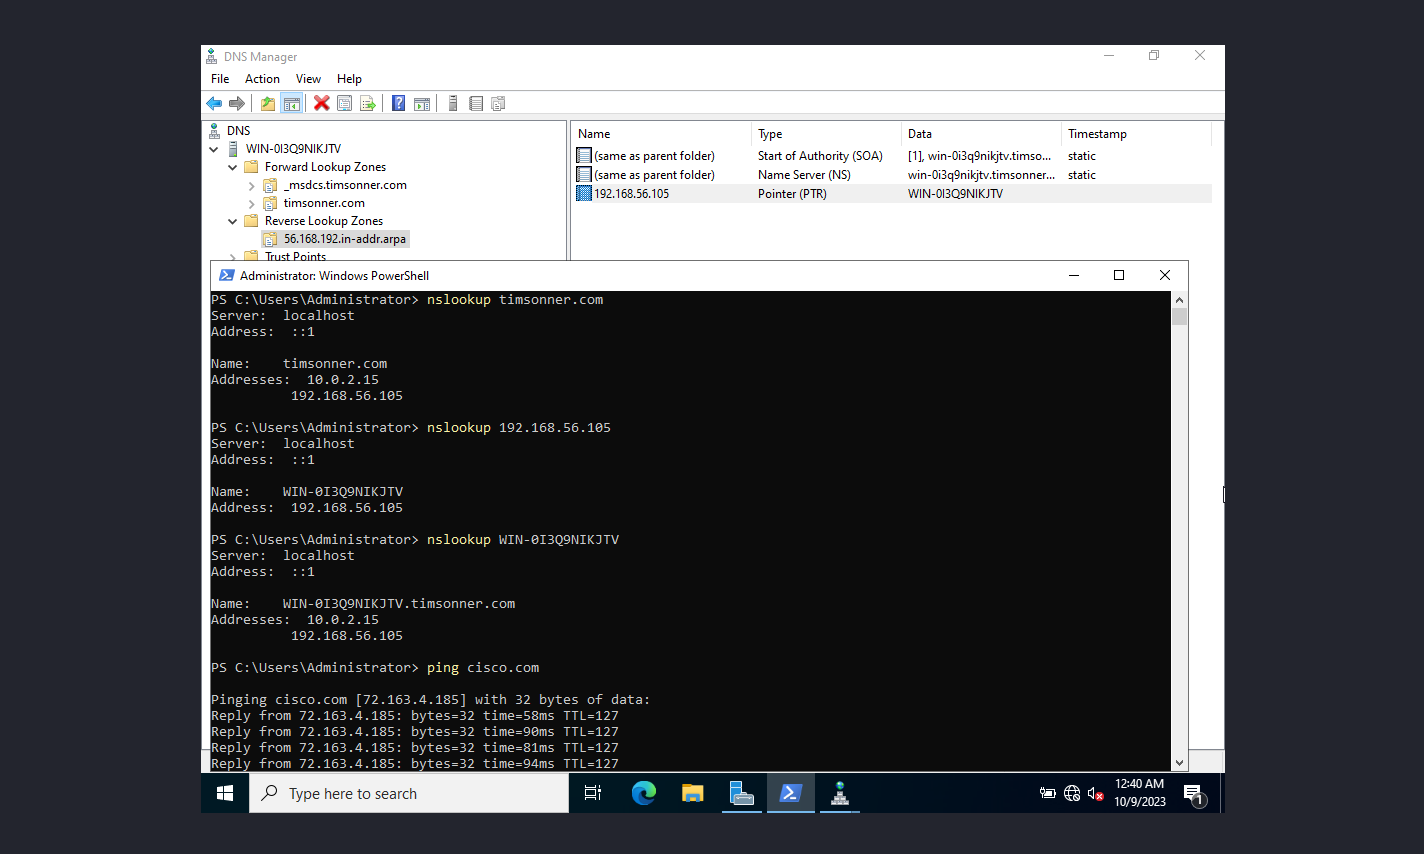
Edit /etc/resolv.conf adding the following line to the top of the file
nameserver 192.168.56.105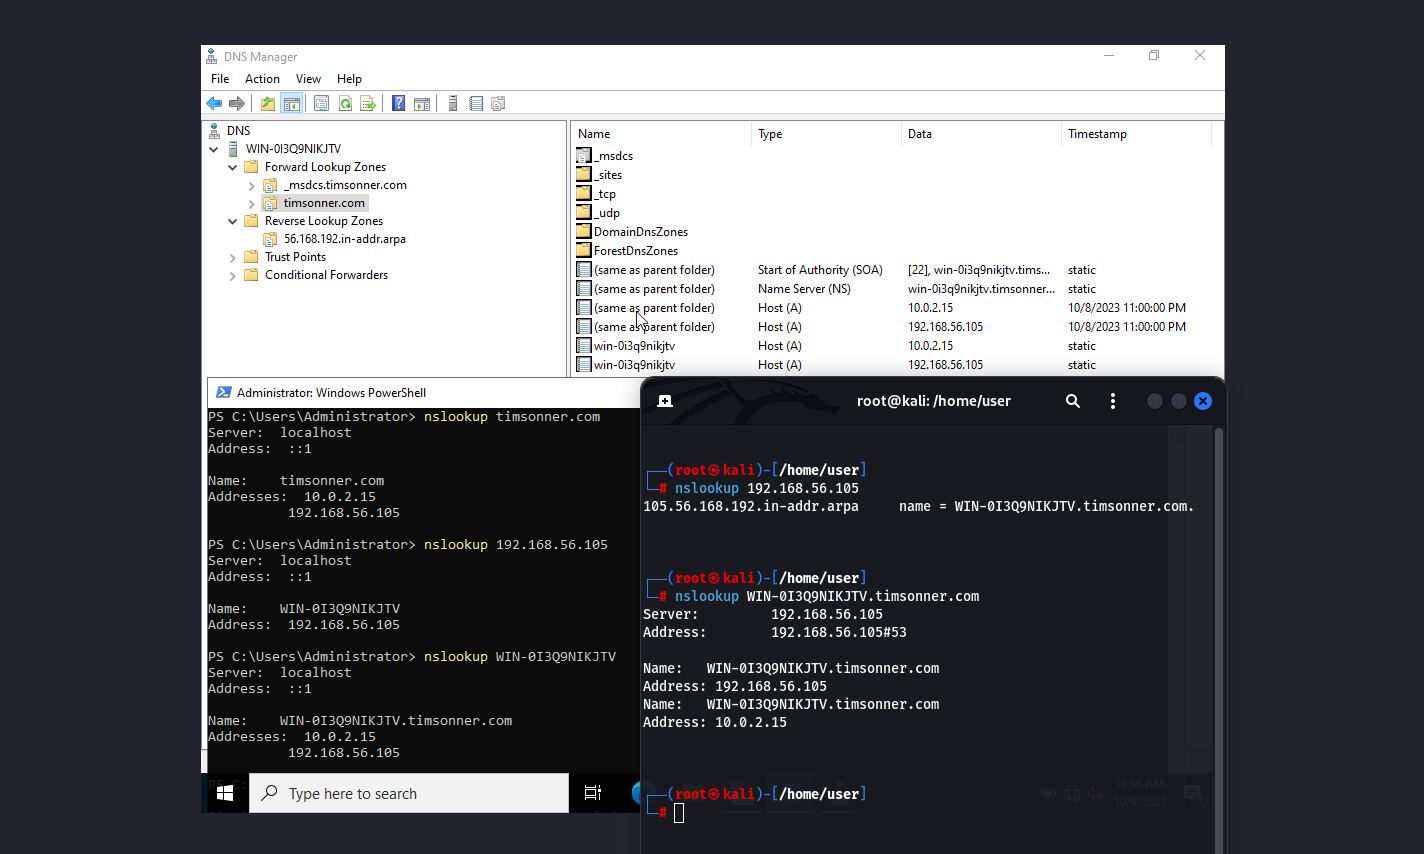
Join Kali to the domain
realm join -v -U Administrator timsonner.com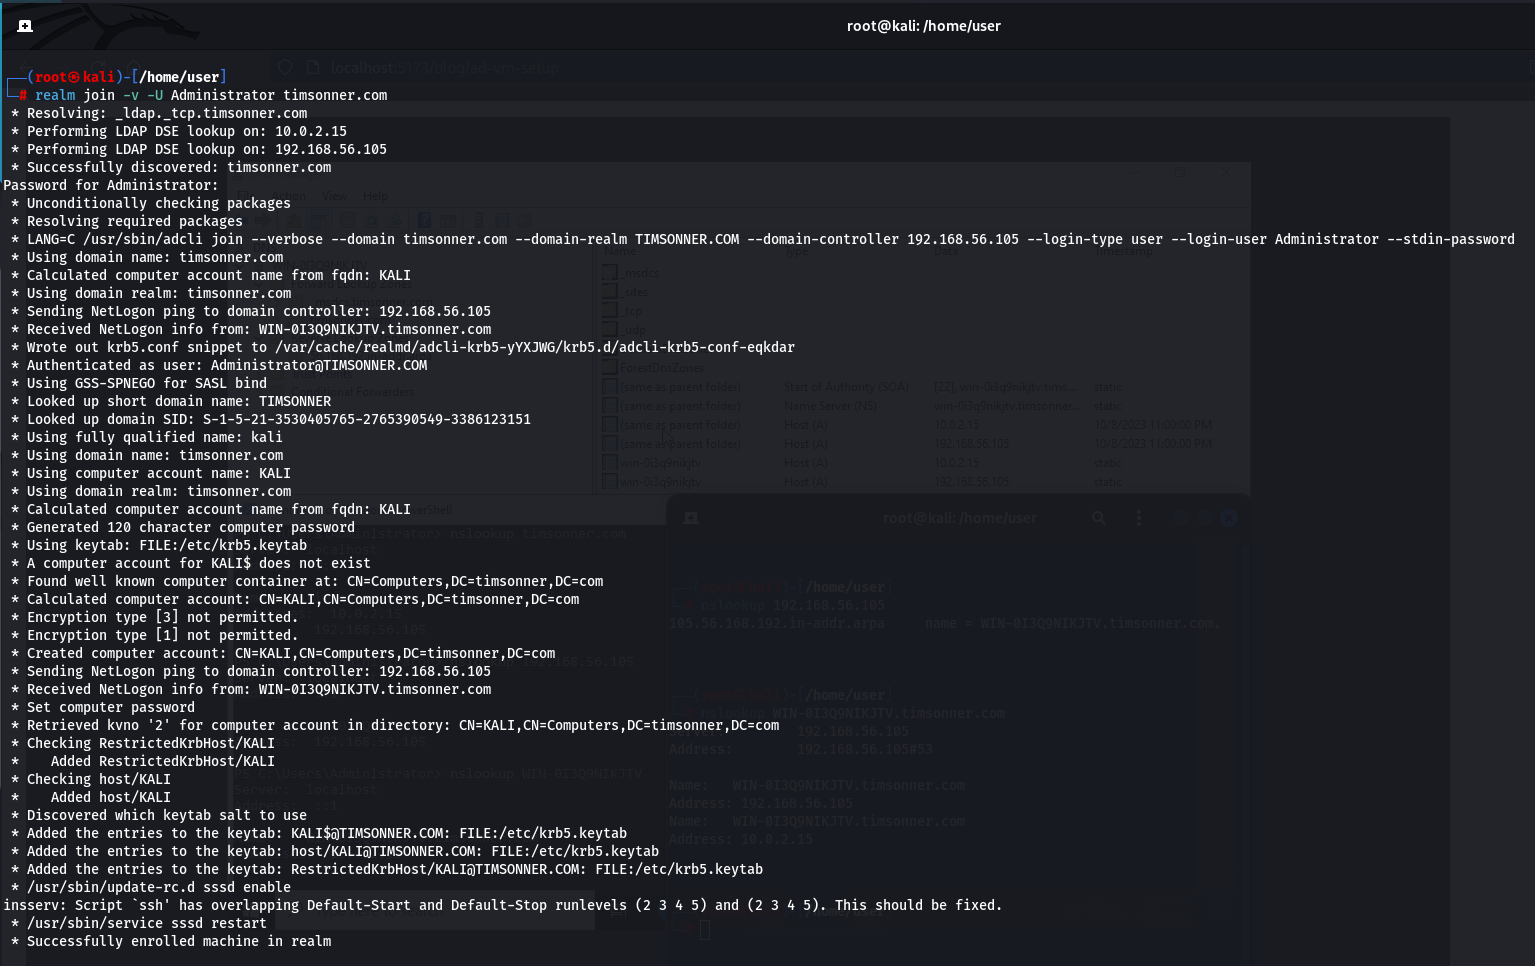
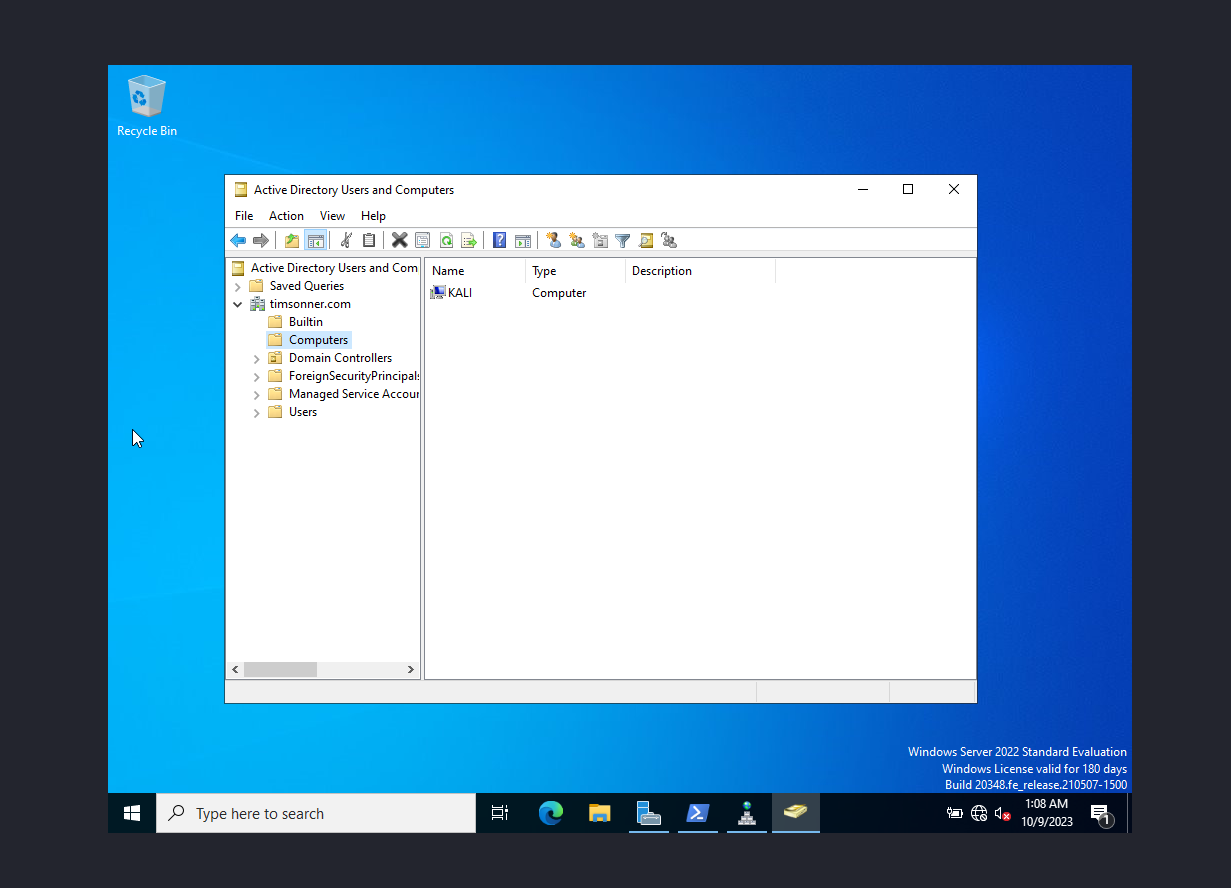
Kali was successfully domain joined…
